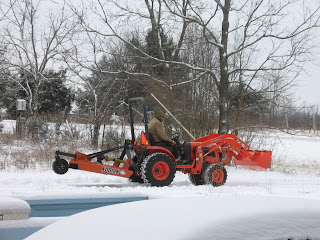
So we had a major winter storm here the other day....3" of snow that shut down all the schools and a lot of the stores. It was actually enjoyable knowing we had all of our preps to last us for months and 3" of snow didnt used to even make us break out a snow shovel but you know, I had to check out the tractor and snow plowing. Using the FEL is definitely not the way to plow though it did in a pinch; we will be purchasing a rear blade.
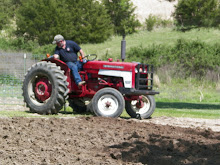
I also need a balaclava or something to cover my face...it was bitter cold and it took me hours to warm up. I will say that the 4WD was almost necessary with our hills and I need to get the tires filled and maybe invest in some chains. I already have a bracket on the front for 3 55lb suitcase weights that I was going to buy a week or so ago but didnt and I need to bite the bullet and just do it. I bought an overrunning clutch for the PTO and I saw the weights there and was just too lazy I guess to buy them at the time. As for the overrunning clutch, I am used to not having one (it keeps the brush hog from acting like a flywheel and pushing the tractor when you disengage the clutch..i.e., the continuing rotation of the blades will keep turning the PTO shaft and thus the trasmission and drive wheels even though the engine is disengaged from the transmission) but it wasnt very expensive and could keep me from going through a fence or taking a wild ride down a hill.
WE have hundreds of birds at our feeders everyday and the Cardinals add such great color.
This is our preliminary layout for the lower part of the barn as far as the fencing. We have been searching for old pictures of the place to no avail yet but it seems logical for our purposes. We will put in fencing all the way back to the pasture fence in back and install a couple of gates to bring the cows in from pasture if needed.
Right now we have it tied into the corner post of the fencing we installed a few weeks ago. It was about 8º in this picture and blowing about 15 so it was cold.
The windows are steel framed and in good shape but over the years the concrete chinking has deteriorated and mostly fallen out. Along the way previous owners just used rigid styrofoam snd spray foam to fill in the gaps. The windows arent loose because they are set in concrete at the top and bottom but the sides are mostly gapped by an inch or more and I am going to use structural cement to chink the gaps. It sounds strange but thats how they did it back then and I am going to follow suit.
Not all the doors to the milking parlor are this bad but we will be replacing them all with pressure treated and we will cross buck them to keep them from warping.
We have a concrete feed bunk with the original milking stantions to the right. Our plan is to take out some of the milking stantions (but not all) to make a couple of stalls.
We have thousands of board feet of mostly oak lumber stored in the milking parlor right now but this is looking down the milking stalls wiuth the previously shown milking stantions to the left and you can see the cleaning/urine shutes down the center. We will build a couple of stalls in this area . If you note the vertical support posts they are stout oak but they are just sitting on concrete footings and I will need to make sure they are fixed so they cant get pushed off the footings by curious or scratching cows. I am not sure why that never happened when it was a dairy but I remember when I worked in a stockyard it was a problem. I am thinking of just taking a 5 gallon bucket to use as a form and embedding the first couple of feet in concrete.
The shutes both have functioning floor drains.
This is the interior of the door shown before...yes we have some critters in the barn.
The milking stalls are to the left in this piture and to the right are two doors that let out to the place where we put the barbed wire fence a few weeks ago. This will be the entry to the stalls.
This was originallt where they stored the hay (there are two hay drops from the hay mow up above) but it stays damp through weeping from the back wall which is below grade. We are building a lean-to off the back side for dry storage and installing gutters which may help but we are probably looking at a false floor.
The entire back side of the barn is full of lumber from a previous owner who owned a saw mill. We have been using it and it will build the chicken coop, more raised beds, lining the pole barn interior etc. with it. That is our basic plan so far but we also need to replace some of the barn tin, paint the barn (the stars have to go) and I will be rewiring it this summer and getting electricity again.


No comments:
Post a Comment